Author name: Sam Reuter

Sam knew there had to be more opportunity in the marketplace, albeit in an industry he already had experience with. So, while working for the lumber company during the week, Sam would start to take on some painting projects on the side during the weekends. This would go on for over a year until the Spring of 2017. It seemed the perfect time to go all in on the painting. He gave his two weeks’ notice and was told, “the door is always open for you here.” That was a nice sentiment, and as it turned out, that lumber company would become one of Painter Pro’s first and largest customers. Sam would continue working closely with the lumber company on their projects and facilities.

Avatar of Sam Reuter
2022-05-28 Painter Pro Plainfield IN Tips For Repainting Your Commercial Property

Tips For Repainting Your Commercial Property in Plainfield, IN

The overall aesthetics and appeal of your commercial properties are important, because these are what sets the appeal of your business to your possible customers.

So, it is important that when needed, you update and maintain the appeal of your commercial property.

One of the most transformative things you can do to it to really elevate and refresh its appeal would be to repaint it.

So, if you’re currently planning to repaint your commercial property, here’s something to help you.

Here are Tips For Repainting Your Commercial Property in Plainfield, IN.

1. Remind And Inform Your Customers And Employees Of The Project Ahead of Time

Coworkers, employees, renters, and customers benefit from a healthy work environment if treated with respect, honesty, and integrity.

So, with this in mind, you must remind and inform your customers and employees of the painting project you’re planning to undertake ahead of time.

As a result, they will be able to make the required preparations for the upcoming project and will be able to adjust easily and seamlessly to the situation at hand.

This is important because you will want to continue with the project without jeopardizing your colleagues’ trust, so make sure that you won’t forget this important tip.

2. Preparation Is Fundamental

To ensure that your repainting project will be successful, you will want to plan ahead of time so that your customers and employees can be fully informed of the before, during, and after stages of your painting project.

Also so you can be in full control of the whole duration of the project.

The time, money, and other considerations that go into painting your business property must be taken into account before you begin the process.

Since you’re repainting a public space, it is important to be even more prepared for all the circumstances that might happen – a sloppy painting job almost always roots in a lack of proper preparation.

So, to ensure your project’s success, remember that preparation is fundamental.

3. Don’t Forget To Prime All Your Surfaces

Whether commercial or not, every painting work requires the use of a primer.

You must keep in mind that primer will provide your paint with the best finish possible.

It strengthens the bond and adhesion of your paint onto your surface and offers better coverage for your surface so that your paint will look even more vivid and brighter.

Additionally, using primer improves the paint adhesion to your walls and acts as a barrier between the paint and the wall.

It offers an additional layer of protection for your coat of paint, which relatively strengthens its durability and lengthens its life.

Also, it’s excellent for hiding persistent stains and flaws in the walls of your home.

So, do not forget to prime if you want your coat of paint to last a long time!

4. Decide Whether To Keep the Existing Color Scheme or Change It Up

The color scheme of your business property should be one of the first decisions you make.

You’ll want to decide whether to keep your existing color scheme or completely change it up.

Deciding to keep your existing color scheme would be great for building your brand and cementing your identity, and it also fosters a sense of customer familiarity and loyalty to your brand.

However, this doesn’t mean that changing things up with your brand is damaging to your business’ rep.

It actually can help you continue bettering and improving your brand identity!

So, think this through comprehensively first, so you can make a decision you’ll move forward with rather than something you’ll regret later.

5. Go For A Final Walkthrough

Lastly, a final walkthrough with a painting contractor is best to verify that your whole painting process goes as planned.

It is helpful to estimate how much everything will cost and how long it will take to finish.

Before doing anything else, it would be beneficial if you made a point of examining for any repairs that may be necessary.

These might cost you more money than expected if you don’t pay attention to them.

Before concluding that a project has been successfully completed, it’s best that you also conduct post-project walkthroughs.

This is only to ensure that the project is completed without error and that no issues arise.


The team of professional painters at Painter Pro can help with your residential and commercial painting needs today.
With our various points of expertise, equipment, and commitment to excellent service delivery, we are sure to conduct any type of interior painting or exterior painting with finesse.
If you require quality teams for your painting needs, reach out to us at (765) 315-2273 and let us strike up a conversation.

Related: Reasons Why Your Business in Indiana Needs A Good Painting Contractor

Four Amazing Tips for a Successful Interior Painting Project

Tips For Repainting Your Commercial Property in Plainfield, IN Read More »

Accent Wall Ideas: Include Art, a Mirror, or a Favorite Color in Your Design

Accent Wall Ideas: Include Art, a Mirror, or a Favorite Color in Your Design

Using an accent wall to bring attention to a focal point in your room can completely transform your space. You have so many options available and it is a simple way to draw attention to artwork, highlight a mirror, or simply use your favorite color in the room. Bold colors will add a dramatic effect to the room whereas soft colors can make the space more relaxing. You can achieve any look that you want with this simple, inexpensive home improvement.

Display Your Art

When you paint an accent wall, it will draw the attention of anyone who walks into the room. You can display your favorite artwork on the wall to really show it off. Make sure that you stick with solid colors on the wall so that your artwork is not lost. You should choose a color that brings out the art without overwhelming it.

You might want to place a table against the wall as well. You can use the accent wall to pull the room together and make your artwork the prominent feature. You should choose a wall without windows if you want your artwork to stand out. The artwork should hang alone on the wall.

Show Off Your Mirror

An accent wall is a great way to show off a focal point in your room. When you paint one wall a different color, it naturally draws the eye of anyone who enters the room. The contrast is a great way to add interest and you can bring in bold colors without overwhelming the room. This is a very flexible way to add décor to your room because you have unlimited choices of color.

Once you select a color, you can hang your mirror in the center of the wall. For example, if you have a navy blue accent wall, you can hang a silver mirror for a striking contrast. The mirror will add depth to your room and you can place a couch or other furniture against the wall as well.

Use Your Favorite Color

Painting an entire room hot pink or navy blue can be overwhelming but you can include these colors in your décor by painting an accent wall. As long as the decor in your room complements the accent wall, you should not shy away from using your favorite color. If your color choice is exceptionally bright, you might consider painting it on a wall that has windows. This will reduce the dramatic effect and still show off your favorite color.

An accent wall looks great when you adjoin similar or complementary shades. You can use neutral tones in the room to make your accent wall stand out. If you use white for the other walls, you can create a very modern look. Using an accent wall to feature your favorite color or a piece of artwork is an incredible way to personalize your home.

Accent Wall Ideas: Include Art, a Mirror, or a Favorite Color in Your Design Read More »

What Should I Do with Leftover Paint?

What Should I Do with Leftover Paint?

If you have just completed a painting project and you have leftover paint, you may wonder what you can do with it. Many people have cans half full of leftover paint sitting in their garage or closet. You can hang onto the paint in case you need to touch up a spot on the wall or use it for a smaller project, but over time painted walls will fade, so it will not do the job well any longer. Here are a few ideas of what you can do with leftover paint to brighten your home and prevent your garage from becoming a paint storage space.

Paint an Accent Wall or Door

One fun project you can do with leftover paint is to paint an accent wall or accent door. Accent walls are a great way to add color to a room, and they help create a focal point. You can paint one wall and strategically place furniture or artwork around it to draw people’s eyes to the contrast. 

On the other hand, if you don’t have enough paint for an accent wall, you can paint an interior door. It might be fun to paint a door bright yellow or blue, and you can be really creative and use geometric shapes to make it more interesting. 

Make Your Trim Pop

Another great project for leftover paint is painting your trim or molding. You can pick a room, such as the kitchen, and if the room is mostly white, paint your trim to make it pop. If you use a dark or bright color, the contrast will look incredible, and it will make your room feel lively and new.

You can also paint baseboards or window trim with your leftover paint. This is an amazing way to frame a window and make it more interesting. No matter what type of trim you choose to paint, it will give you a unique look that other homes do not have.

Revive Old Furniture

If you have an old table or chairs, a fresh coat of leftover paint can really bring them to life. You can apply this concept to old light fixtures and picture frames as well. Depending on how much paint you have left, there is a lot you can do to revive the dated items in your home.

Another choice is to paint the inside of your kitchen cabinets. When you open them, you will have a pop of color to brighten up your kitchen. You can paint the back walls of the cabinets or the whole interior, it just depends on how much paint you have left. 

Finally, you can give your garage a makeover. This is a fun place to paint an entry door or part of the walls. The garage is a great place to experiment, and you might come up with a look that you want to apply inside the house later. There are many things you can do with your leftover paint to prevent it from collecting dust in the garage.

What Should I Do with Leftover Paint? Read More »

Kids’ Bathroom Ready for a Fresh Coat of Paint?

Kids’ Bathroom Ready for a Fresh Coat of Paint?

If your kids’ bathroom is ready for a fresh coat of paint, you can have a lot of fun with it. Kids love rooms with bright colors and points of interest, and there is a lot of room for creativity. You want to choose paint that will help to conceal dirt and handprints, and there are many great options out there.

Ocean Blue with White Trim

You can paint your child’s bathroom ocean blue with white trim. This is a great color for a fun beach style bathroom. You can use these colors for boys or girls, and add some turtles and fish for accents. You can match towels and other bathroom accessories and create a great space for your kids.

Ocean blue is a calming cool color, and it will really brighten up your space. Blue is a crisp and clean color that will make this room feel bright and cheery.

Sage Green with Red Trim

Sage green is a very popular color right now, and it will look great on the walls in your kids’ bathrooms. This color will not overwhelm the bathroom, and if your kids are into nature and camping, they will love this color. If you use red trim, it will add a nice contrast. You can also get red towels and bathmats to tie the look together. 

If you don’t want to try red for the trim, you can also use dark green, which will look stunning. This will add more dimension to the room and take you back to nature. You can use dark green towels to tie this look together, or try something completely different such as yellow or red.

Sandy Tan Walls with Navy Blue Trim

If you paint the walls sandy tan in your kids’ bathroom, you have so many options for your décor. This is a nice neutral color that goes with anything. Navy blue trim is crisp and clean, and it will add interest to the bathroom. If you want to make a theme with these colors, you will have options such as a cowboy or western theme. 

If the bathroom is for a girl, you can use pink or lavender for your accent colors. You can add some flowers. The sand color is clean and crisp and matches just about any color you want to use for accents. 

Bright Yellow with White Trim

Bright yellow is a favorite among kids. It is reminiscent of the sun and the outdoors, and it is such a cheery color. You can paint your kids’ bathroom bright yellow with white trim or any other neutral colors. You can also pair it with navy blue or aqua walls to add more color. This will make your kids’ bathroom a fun place for them to take a bath and get ready for bed.

Final Words

You can have a lot of fun with your kids’ bathroom color. Kids love bright and cheery rooms, and you can have a lot of fun with the décor. Any of these colors will add brightness and interest to the room.

Kids’ Bathroom Ready for a Fresh Coat of Paint? Read More »

Four Amazing Tips for a Successful Interior Painting Project

Four Amazing Tips for a Successful Interior Painting Project

There are few things that are quite as satisfying as a homeowner than painting your home. Painting is one of the purest forms of expression, and it can be a great way of adding color and value to your property. Besides that, painting your property can help seal and insulate it.

Interior décor is classically seen as a marriage of form and function, and painting one’s home is, thus, a great way to do just that.

But what’s the best way to go about it? After all, “expression” won’t count for much if the paint job is sloppy or your home becomes a paint splattered mess.

With that in mind, let’s take a look at four amazing tips for completing your next interior painting project in style.

  1. Quality Counts

First and foremost, you’re going to want to invest in quality brushes, rollers, and paints. Inexpensive roller covers can leave fuzz and lint behind, which is hardly what you want for a clean, effective paint job. The same is true of brushes, with lower quality options being scratchy and streaky. In addition, just as inexpensive rollers can shed and lose fuzz with repeated use, so too can inferior brushes lose their bristles more quickly than high-quality options.

This can impact the paint job.

Just as important as the quality of the painting implements is that of the paint itself. If you choose a paint that is thin, flaky, or easily-chipped, you’ll be left with patchy walls that you’ll have to repaint regularly. What’s more, less expensive versions of colors such as white can fade or go sour with time.

Instead, you’ll instead want to invest in professional-grade paints such as Valspar and Sherwin-Williams. In addition, you’ll want to apply finish and sealant after painting to help protect your paint and keep it in good condition and quality for years to come.

  1. The Duct Tape Test

Few things are more annoying than finishing a paint job only to have to touch it up a few days or weeks later as the paint begins to prematurely dry and flake. The “Duct Tape Test” is an inexpensive and fast, yet effective way to see how well paint holds to a surface. As the name implies, simply stick a patch of duct tape onto a recently-dried painted surface and then “let ‘er rip.” If the paint holds firm and doesn’t peel or flake off with the tape, you’re good to go.

  1. Overlapping Marks and Wet Edges

Leaving overlapping marks can make your paint job look slipshod. The glossier your paint, the more likely it is that it will produce overlapping marks. Glossy paint is especially tricky, while flat and matte paint can be used with virtually no fear of overlapping marks. With glossier paint, therefore, you’ll want to keep the edge of your brush or roller wet. This can help mitigate the risk of overlapping marks.

  1. Color and Finish

If you’re looking to brighten up your living room, kitchen, bedroom, or another area of your home with light-colored paint, the finish is essential. It can help lock in that color, while the gloss itself reflects light, thereby brightening up your room all the more. By contrast, if you’re going for a darker color scheme, matte painting without gloss can help your walls absorb light and, thus, appear moodier and darker.

With these tips, you can add life and color to your next big paint project.

Four Amazing Tips for a Successful Interior Painting Project Read More »

How to Create a Faux Wood Grain Paint Finish

How to Create a Faux Wood Grain Paint Finish

Many, many people can agree that wood grain is a gorgeous pattern on trim, doors, and other surfaces. Unfortunately, wood that has a good-looking pattern is often going to be considerably more expensive than other kinds of wood. In situations such as these, if you have a little bit of talent for painting and you have the patience to find the exact materials that you need, you can create a nice faux wood grain finish that you can apply to a much less expensive piece of wood. If done right, you will have the wood design that you have always wanted, while saving a fair amount of money. 

What Should You Have Beforehand? 

From picking out the colors you need to determine what type of wood grain you want to mimic, there are a few ways that you need to prepare yourself before you take on this project. First things first, you are going to have to decide what type of wood you are planning to imitate. Whether you want to replicate a vertical-grain wood, or you would rather put in the extra work for more distinctive patterns, is completely up to you. The more complex you get, the more you will want to test out the glaze on a piece of the wood to make sure you are getting the right color though. 

There are two parts to choosing the right color for the faux wood grain finish. You are going to want a thinned, low-sheen enamel paint in a lighter color for your base coat. Just how light you go depends on the species of wood you are imitating. The next thing you will want to think about is the glaze. The glaze should be heavy-bodied and oil-based. You can test out glazes by smearing it onto the base color paint samples to see if it reaches the desired wood color. 

Now that the two most important parts of this have been settled, you will want to collect the rest of the supplies to get the job done. You will want to pick up a satin varnish (polyurethane works too), sandpaper (either 220-grit or 320-grit wet-and-dry), a trim brush, and a flogger brush (or one with similar bristles). If you are going to be working with a more detailed grain, you will want to find steel graining combs and some inexpensive rags. 

Creating the Pattern

Once you figure out what you want to do, getting the pattern down is going to be relatively simple. You will want to apply the lighter base coat in the direction of the inexpensive wood’s grain to diminish any extra brush marks. Apply it as smoothly as possible and remember that two coats are always going to be better than one. Also remember to thin the paint out. Once this paint layer has dried, you should sand the paint with the sandpaper and water, using the 220-grit one for oil-based paints and the 320-grit wet-or-dry for latex paints. You should clean off the surface afterward. 

Next, you will want to brush the glaze onto the wood in long, smooth motions. The glaze will help to imitate the grain of higher-quality woods while also allowing the base coat to shine through. For simple grain patterns, you can press down on the bristles as you paint the board. You can alternate the pattern of the grain by moving the bristles around as you paint. Once the glaze has dried, you will want to apply the varnish with the grain of the wood. You generally only need one layer of varnish, although two layers sometimes works better for areas that get a lot of use. 

How to Create a Faux Wood Grain Paint Finish Read More »

What Is the Expected Time Frame for an Interior Painting Project?

What Is the Expected Time Frame for an Interior Painting Project?

It is no secret that changing up the paint in one’s home can have a substantial impact. Even putting a fresh coat of the existing color on can leave the space feeling refreshed and new in appearance, giving your home a renewed visual appeal.

Going with a brand-new color, however, can leave your home feeling completely different without having to undertake a massive renovation. To put it simply: painting is the easiest way to change things up. There’s a reason that the saying “put a fresh coat of paint on it” is a shared colloquialism. 

But here’s one thing that most people don’t consider when they take on the task of changing up the paint in one or more rooms of their home: how long will it take? This can depend on many factors, but here are a few things to keep in mind when looking to repaint a room or rooms in your home.

How Big Is the Job?

This is the million dollar question. If you are painting just a single room, the length of the job won’t be too great. All it takes is a gallon of paint, a little bit of prep work, and physically painting the room to complete the task.

But if you plan to take on more than one room in your painting endeavor, it can lengthen the task substantially. If you are taking on multiple rooms, try to give yourself something of a time budget. For example, if you think it will take you six hours to complete one room and you have three total, allot an entire weekend to the task.

The key is to not rush through the job. While the bulk of the painting is very straightforward, the detail and edgework is what can make all the difference in the world. Rushing through can result in dripping and uneven painting.

What Kind of Manpower Is Available?

Another thing that can weigh heavily on the amount of time that it takes to complete the job is just how much help you may or may not have. If you plan on taking on the entire project alone, that means that you’ll need to give yourself a little bit of a buffer to get the job done properly.

Again, the key is not to rush through the job just to get it done. Ensure that the edgework is done properly and that there are no streaky or dripping spots. 

If you are on a limited schedule, it is ideal that you get help from friends or family members. This will allow you to cover ground quicker than you would on your own, getting the job done faster even if it is more comprehensive.

These are just a few of the factors to take into consideration when it comes to the length of time required for an interior painting project. Take these into consideration and you should be able to get the job done quickly, effectively, and looking the way that you want.

What Is the Expected Time Frame for an Interior Painting Project? Read More »

Refresh Your Living Room with These Color Ideas

Refresh Your Living Room with These Color Ideas

There is nothing quite like a fresh coat of paint. Your living room is a great place to relax, entertain friends, and spend time with family. It may feel dated to you after staring at the same walls for years and years. Redecorating and covering furniture can be so expensive that it’s hard to enjoy the room once it’s done, but the perfect affordable alternative is to update it with a fresh coat of paint. Take a look at these color ideas that will transform your living room today.

Taupe

Taupe is a great color to create a peaceful environment. It mimics the natural state of wood, and it has a rustic and clean feel to it. You can paint your living room taupe to give it a new look, and it will go with any of your existing furniture and accent pieces. If you want a splash of boldness, paint an accent wall orange.

Deep Teal

Deep teal reminds people of the ocean, and it can bring harmony to your living room. It looks particularly amazing with lighter wood colors and accessories throughout the room. If you have light flooring and a few cream-colored accent blankets or pillows in your living room, this color could really bring a new vibe to your living room.

Mint Green

Mint green is a fresh and crisp color that is sure to make you feel relaxed and calm when you enter your living room. It will look great with almost any of your current furniture pieces, and you can add a few plants to enhance the serenity of your space.

Pale Pink

Pale pink can bring in a feeling of innocence and freshness. You can pair it with most furniture, and it will open up your space. Try to use a shade of pale pink that touches on the peachy side, and it will go well with mustard yellow or gray accents. If it’s just too much pink for you, try using it as an accent on one of the walls. It will freshen up your living room beautifully.

Bluish-Gray

Gray has been popular for a while, but if you go with gray with an icy blue tint, it adds some charm to the room. Paint your molding and window trim white, and this color will be crisp and fresh. It will especially look nice with plush light colored furniture. 

Lilac

It may take some nerve to paint your living room lilac, but this color will make your living room the coziest in the house. If you want to ease into it, start with an accent wall in this color. Once you see how bright and cheery it makes you feel, you will be ready to paint the rest of the room this color.

Merlot

The deep, rich color of Merlot will add depth to your room, especially if you accent it with white trim. You can paint the entire room or try an accent wall. Either way, it will look lovely with yellow or navy blue furniture and accessories. 

Refresh Your Living Room with These Color Ideas Read More »

How to Clean Paint off Your Carpet

How to Clean Paint off Your Carpet

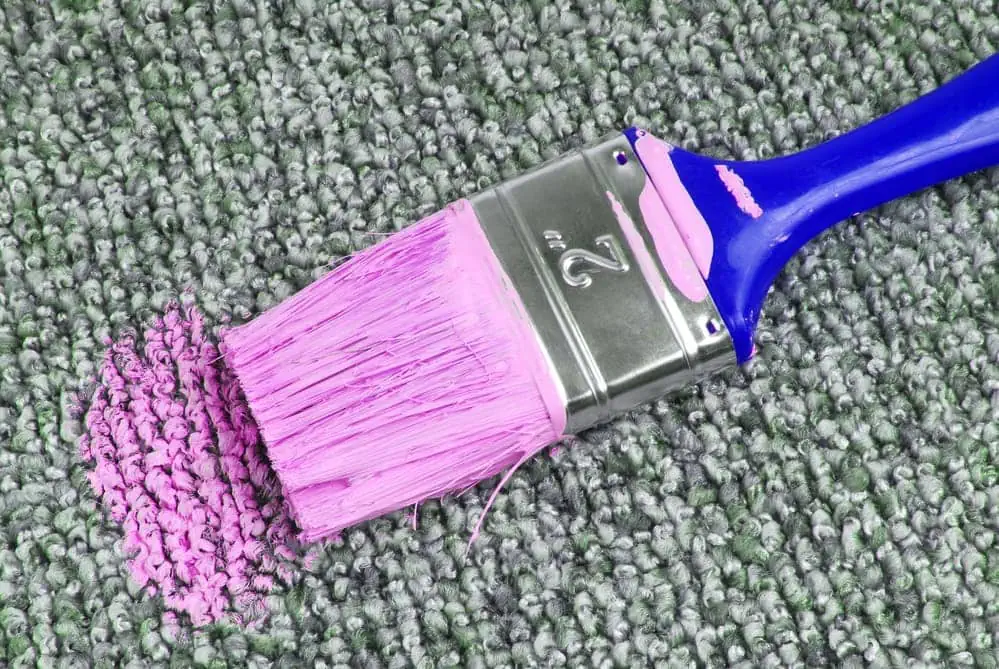
It can happen to anyone. You are painting and, no matter how many precautions you take, you find a spot of paint on the carpet. Fortunately, there are several ways to remove the stain and your carpet will look as good as new. First, you need to know whether your paint is latex-based or oil-based so that you can choose the appropriate method to remove it.

Removing Latex-Based Paint From the Carpet

Latex paint is water-based and it is easy to remove whether it is dry or wet. If it is still wet, you can blot the spot with a paper towel. Make sure that you don’t scrub as this will actually embed the paint further into the fibers. You can also soak a rag in hot water and use it to blot the paint spot. Continue blotting until the paint is gone.

If the latex-based paint is dry, you can fill a spray bottle with hot water or hot water and a little bit of dishwashing detergent. Spray the dried paint and let it soak for about 20 minutes. This will soften the paint. Once the paint softens, you can use a paper towel or a rag that is soaked in hot water to blot the paint stain. Just as with the wet paint, blot the paint until it is gone.

Removing Oil-Based Paint

Oil-based paint is a little trickier but you can remove it with a little effort. The easiest way is to use a chemical solution such as paint thinner or turpentine. If the oil-based paint is still wet, start with an old rag that is soaked in hot water. Dab the wet spot and remove as much of the paint as you can. If the carpet has any stain where the oil is in the fibers, you can dab it with a towel that is dipped in turpentine or paint thinner.

If the oil-based paint stain is dry, it is a more complex process. If you have a steamer, you can apply it to soften the paint. Use a needle or a safety pin to pick at the stain while you soften it to help break it up. Blot up as much as you can and vacuum the carpet.

If the stain is stubborn, you can apply one of many different cleaning solutions and let it soak for a few minutes before dabbing it with your towel. You can use the following solutions:

  • Turpentine: less popular because of chemical properties, but effective
  • Paint thinner: chemical solution, but effective
  • Citrus solution: popular because of natural properties
  • Rubbing alcohol: may not remove entire stain, but a good starting point
  • Water and detergent solution: works well
  • Hydrogen peroxide solution: watch carefully; can cause the color to fade
  • Ammonia mix: effective, but can cause the color to fade
  • Vinegar mix: works well

After you apply any solution and let it soften to dissolve the oil-based paint, blot it with a towel that has been soaked in hot water. Continue until the paint stain is removed and vacuum the carpet. If you have used a chemical-based solution, you will want to rinse the carpet with warm water before vacuuming.

How to Clean Paint off Your Carpet Read More »

Scroll to Top